Thursday, August 25, 2011

Product Feature: Satin Covered Headbands


We started selling satin covered plastic headbands last year and they were a hit! We have now brought in a higher quality satin covered headbands. We are now selling two sizes! We now have 7mm and 10mm available. They are sold by a single piece or by the dozen.

Hot Pink
We offer a wide variety of colors to create fun hair accessories. The satin covered headbands allow you to skip the headband lining step when making hair accessories. You can either embellish these or wear them as is!
Orchid
Purple


We offer all colors in both sizes (except mint which is only sold in 7mm). The colors that we offer are black, white, red, turftan, orchid, purple, ivory, tan, pearl pink, pink, hot pink, silver, lime juice (light green), and olive.


If you are feeling crafty, you can purchase some of our metal or plastic headbands and line them yourself with our wide selection of ribbon.

Wednesday, August 24, 2011

Product Feature: Resin Flatbacks


Lady Bug Resin Flatback
Medium Resin Hello Kitty

Resin flatbacks can be used for many crafts by creative crafters. The most common use for these flatbacks are attaching them to hair clips and bobby pins. You can also attach them to ponytail holders. They can also be used for scrapbooking, invitations, or party favors.

Princess Resin Flatback
Cherry Resin Flatback


All of our resin flatbacks are sold in quantities of 10. We are constantly expanding our selection of flatbacks to better meet the needs of our crafters.We currently offer a wide variety of fun designs along with a variety of colors.


In addition to resin flatbacks, we also sell fabric covered flatbacks and acrylic gems. Be sure to check out our site for a variety of embellishments that you can use for your crafting needs.

Monday, August 22, 2011

Sequin Headbands

                                
                                          The sequin headbands are a new addition to our inventory.

All of the female athletes are wearing them! These sequin headbands spice up any outfit. They can be worn with any attire. These headbands are fun and add a little bling to your hair.

We have a wide variety of colors available. We sell these in Crystal AB, Black, Pink, Fuchsia, Silver, and Purple. The sequins on these headbands change colors when the light hits them a certain way. These are great for infants, children, and adults. We sell them in two sizes. The smaller size is perfect for infants and young children while the adult size is great for teens and adults.

They are great to use while working out, playing sports, or hanging out with friends.


Be sure to check out the new products we have added to our inventory.

Saturday, August 20, 2011

Chinese Braids - What do we use these for?

Chinese braid ribbon can be used to hide the imperfections of under the headbands and to hide the seams of ribbon or fabric covered headbands. You line these under the headband just as you would line the top of the headband with ribbon.

Some creative crafters have used these to give the headbands a grip so that they do not slip off of the head so often.

We offer them in both white and black and they are sold in incremements of five yards.

Be sure to browse our selection of ribbon and headband liners to create fun and exciting headbands.

Wednesday, August 17, 2011

NEW PRODUCT FEATURE: Felt Rounds

Attaching flowers or other embellishments to headbands and clips can be a hassle but not when you use the almighty felt rounds! It is simple to use them. All you need to do is attach the felt round to the embellishment and then attach it to the hardware of your choice.
We also supply felt ovals which make attaching flowers to pinch clips easy. They are great for attaching embellishments to non-flat surfaces.
We make crafting easy by offering a variety of sizes to work with. You can find 20mm, 25mm, 35mm, and 50mm in our shop. We currently have one size of felt ovals which can easily be trimmed to a smaller size.
Our felt shapes all come in the same six colors: White, Black, Red, Pink, Purple, and Green. They are sold in single colors at a quantity of 10.
Who says that felt rounds can only be used to attach embellishments to hardware? There are many other uses for these felt shapes. Check out this tutorial by Miranda of One Little  Minute on making flowers using felt (No need to cut the felt into circles. We have done that for you!).

                   Be sure to check out the fillet tape and fillet disks as a way to avoid the mess of glue.

Tuesday, August 16, 2011

Plastic Headbands & GIVEAWAY

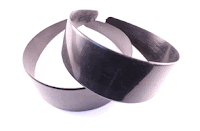
Our plastic headbands are great for lining with ribbon and adding embellishments. We sell a wide variety of plastic headbands. It is like shopping in a candy store, there is so much to choose from!

We have three styles of headbands. We have regular plastic headbands, plastic headbands with teeth, and non-tapered headbands. Our plastic headbands with teeth are great for those active children and adults. The teeth provide a grip so that they stay put throughout the day.

Most of our plastic headbands come in both black and white. The white headbands are not bleach white but more if like an ivory. Our headbands can be worn as is but most choose to line them with ribbon and decorate them.

The non-tapered headbands are the same width from end to end. This makes it easy for those who want to line the top of the headband with either a headband liner or ribbon. We offer non-tapered in both 5mm and 14mm. We currently do not have ribbon small enough to line the 5mm but you can easily wrap ribbon around these. In order to line the 14mm non-tapered headbands, 5/8" Ribbon works best to cover the entire width of the headband. You can use 1/2" ribbon but since the headband is exactly 1/2" in width, it can be a little hard.

The plastic headbands come in a wide variety of sizes. Below is a list of all of the plastic headbands that you can find in our shop.

 - 5mm white non-tapered                            - 20mm white
 - 7mm white/black with teeth                      - 25mm white/black
 - 7mm white                                               - 35mm white/black
- 10mm white with teeth                              - 50mm white/black
- 10mm white
- 14mm white/black with teeth
- 14mm white/black
- 14mm white non-tapered

GIVEAWAY: Tell us which plastic headband is your absolute favorite to use and why, in our comments section. The first 20 comments we receive within the week, we will send you 1 dozen (12 pieces) of your favorite plastic headbands for FREE. Please make sure to check back on August 23rd to see if your name is on the winners' list. Good Luck!


Monday, August 15, 2011

Product Feature: Fabric Covered Flatbacks

Fabric covered flatbacks are great for many different craft projects. They can be great embellishments for hair accessories, such as clips, bobby pins, and headbands. They are also perfect for scrapbooking, quilting, card making, and other projects.

We sell stars, hearts, bows, round, and we have recently added square fabric covered flatbacks. We sell most of the designs in both small and large.

All of our shapes and sizes come in white, fuchsia, light pink, and kiwi. While the new squares come in fuchsia, navy, tan, and purple. Some of the shapes also come in pink and tan plaid. They are all sold in quantities of four. This makes is easy to create two pairs of clips!

The back of the flatbacks are metal. This makes it easy to attach them to clips, headbands, or scrapbooks. You can use hot glue, super glue, or a piece of double sided fillet tape.

 Be sure to check our website for a complete list of fabric covered flatbacks. While on our website, browse through our resin and acrylic flatbacks as well.

Friday, August 12, 2011

Feature: New Appliques and Flowers

We recently listed a large selection of new flowers and appliques. We would like to feature a few of these new embellishments.

Fleece stockings are in - in time for Christmas holidays.
Flowers with gem in center.
Perfect gerbera daisies in light peach
Sequin skull with fleece underlay
Sequin and lace rose

Flower with sequin center

Large daisy with scattered gems

Wednesday, August 10, 2011

Where Do We Ship Out Of?


Thank you to those who guessed on the number of products we started with. The correct answer was 50 products. The number of items in our store have far exceeded the amount of space we initially started with. We now operate out of a 3,000 sq ft warehouse space here in Oregon, with more room for expansion. We do not have a brick and mortar store but we allow our local clients to come pick up their orders once they are processed.

For those who left a comment on our giveaway blog post, please e-mail us at customercare@trimweaver.com with your name and address and the i.d. you posted your comment as, and we will send out your prize to you. Thanks again for your participation.


Happy Crafting!

Tuesday, August 9, 2011

Last Chance to Enter for our First Giveaway


Check this out!

We'll take comments all the way till 11:59 PST tonight!


Monday, August 8, 2011

Crochet Headbands and Hats

Check out our variety of Crochet Headbands and hats, along with our Beanie Hats. You can attach flowers or any other embellishments onto these hats to make professional looking hair accessories for either yourself or child. We offer a wide variety of embellishments to personalize and customize hair accessories.
We sell the crochet headbands in two sizes: 1.5" and 2.5". Be sure to check out our wide variety of colors. Our large selection makes it easy to create an accessory that will go with any outfit!

Crochet Kufi Hat
Our hats come in both a small size and a large size. The small size is perfect for young children. The large size is great for us adults that want to spice up our outfits.

Beanie Hat
The beanie hats also come in two sizes. They have the ability to stretch to fit a variety of sizes of heads.


Woven Headband Sample Pack
Be sure to check out all of the fun colors we offer in our woven headbands and hats. If you want to sample many colors of these products, we offer them in sampler packs. Also, be sure to look at other hair accessories we sell on our site.

Don't forget we have a giveaway that will end tomorrow! Please leave a comment to enter.

Sunday, August 7, 2011

Step by Step Instructions on How to Create a Woven Headband

BEFORE YOU START, YOU WILL NEED:
1. PLASTIC HEADBAND (14mm, 20mm, 25mm, or 35mm)
2. 3/8” SOLID GROSGRAIN RIBBON (we are using two colors but at some point, you can add or reduce the colors to your choice).
3. 45MM SINGLE PRONG PINCH CLIPS (6 PIECES)
4. MEASURING TAPE or RULER
5. GLUE GUN with ALL-TEMP GLUE STICK
6. SCISSORS
7. LIGHTER (for sealing the ends of the ribbons)

PREPARATION BEFORE WEAVING:
1. First, you will need to measure out the amount of ribbon required for this project. You will need approximately, 36” – 40” (90cm – 100cm) per ribbon. Measure out 4 pieces of ribbon in the length indicated, in two different colors. In this project, we used PINK (for the center) and BROWN (for the side).
2. Seal the edge of one side of each ribbon by gently running a lighter through it. This will protect the ribbons from fraying.
3. You are now ready to begin.

INSTRUCTIONS:

STEP 1: Put a small bead of glue onto one end of the PINK ribbon. Adhere one end of the BROWN ribbon onto the PINK ribbon approximately ¼” (0.5cm) of overlapping. Repeat Step 1 to make the other piece of the ribbon combo. Now you are ready to glue the ribbons to the plastic headband.

STEP 2: With one end of the plastic headband facing you, glue the center of the ribbon combo on the inside of one end of the plastic headband. Make sure that the PINK ribbon is pointing to the end of the plastic headband.

STEP 3: Flip over the plastic headband with the top facing upwards, glue the center of the other ribbon on the top edge of the headband. Make sure that the PINK ribbon is pointing to the end of the plastic headband. Once you’ve had both sides of the plastic headbands covered with both ribbons – one on eside, it should look like an “X” with both PINK ribbons pointinto the top and BROWN ribbons pointing to the bottom.

STEP 4: Add a dab of glue on the top edge of the headband where it is covered by the ribbon. Bring the bottom left PINK ribbon over to cover the top seam. You will now have the bottom PINK ribbon on the right side of the headband.

STEP 5: Add a dab of glue on the bottom edge of the headbdand where it is covered by the ribbon. Bring the top left PINK ribbon over to cover the bottom seam. You will now have the top PINK ribbon on the left side of the headband.

STEP 6: Bring the top right PINK ribbon under, over to the left side of the headband. You should now have two PINK ribbons and one BROWN ribbon on the left side of the headband, with one remaining BROWN ribbon on the right side of the headband.


STEP 7: Add a dab of glue on the top of the headband and bring the remaining BROWN ribbon from the bottom, over to the top of the headband, onto the left side. You will now have all four ribbons on the left side of the headband.

STEP 8: Add a dab of glue on to the BROWN top ribbon, and using the PINK ribbon that is second from the left, flip it over the top and move it to the right side of the headband.

STEP 9: This is the last step before you go back to the very beginning of the repeating “step-by-step” weave. Bring the very top BROWN ribbon on the left side, under and over to the bottom right side of the headband. You are now back to the very beginning of the weave.

To cover the entire headband, you will need to keep repeating STEPS 5 to 9, all the way to the end of the headband. Note that before you start STEP 5, your ribbons should be in the original starting position where the top right ribbon is PINK, the bottom right ribbon is BROWN, the top left ribbon is BROWN and the bottom left ribbon is PINK. Don’t be afraid to make mistakes as it’s very easy to unravel and return back to the starting position as described, in regards to the ribbon positions.

USEFUL TIPS:
1. Use the pinch clips to hold the ribbons in place after you’ve repeated several times of Steps 5 to 9.
2. After so many weaves, it’s important to add a dab of glue to hold the ribbons in place.
3. Keep adding pinch clips to hold the ribbons in place as you weave around the headband.
4. Constantly check the tension of the ribbon to make sure that you are not pulling too tight or weaving it too loosely.

FINISHING OFF: To finish off the headband, you would want to weave all the way to the end. As you approach the end of the headband, you should start adding a dab of glue to every weave in order to secure every ribbon into place. Cut off the remainder of the ribbon tails, leaving behind approximately 1” (2.5cm). Then, start tucking and gluing the end pieces into place as neatly as possible. The last piece that is to be used to cover the seams, remember to run the lighter through in order to seal the edges of the ribbon, before gluing into place.


AND, VOILA! YOU HAVE YOURSELF A BEAUTIFUL PIECE OF WOVEN HEADBAND! HAPPY CRAFTING!

Friday, August 5, 2011

Sewing Kits (Did you know....?)

Elephant Sewing Kit

A great way to teach young children how to sew is to start them with these cute little sewing kits that we have available on our web site.

These sewing kits come in different shapes and sizes, and it has everything that you need to help them get started with basic stitching and stuffing. The end result is cute and adorable!

Here are a few pictures of our bestsellers. We've had great responses and feedbacks from summer camps that purchased them as projects for young campers between the ages of 7 - 12. Summer is almost coming to an end. Why not teach your child a skill that will be useful to them later on, by investing in one or two of these sewing kits?

Happy Sewing!


Thursday, August 4, 2011

Our First Giveaway

We've been busy trying to get our warehouse organized - making room for all the new products that just trickled in. Can't wait to show you what we've got!

Believe it or not, we now have over 2000 line items in our warehouse! Gee willikers! How did we get here?

That's for you to take a guess and for us to reward you with a lovely sampler pack. There are 50 packs to be given away.

We started Trimweaver almost 5 years ago with just ** products on hand. If you'd like us to send you a lovely sampler pack, leave your answer in the comments section as to how many products you think we started with.

We will close this guessing game at midnight on August 9th, 2011. Have fun and Happy Crafting!